As cell apps develop and attain individuals all over the world, making them appropriate for various languages and areas turns into crucial. This course of, referred to as localization, ensures the app feels pure and straightforward to make use of for everybody, regardless of the place they’re.
Good localization can enormously enhance the consumer expertise, making the app extra accessible and engaging to extra individuals.
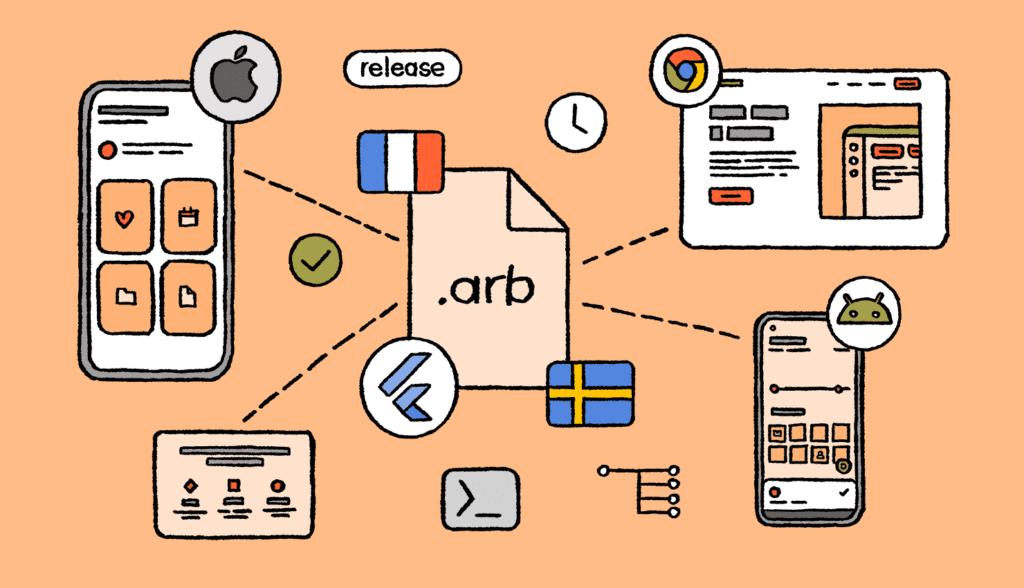
This text will stroll you thru how one can localize a Flutter app growth, making IT accessible to individuals all all over the world. Right here’s what we’ll cowl:
- What’s Localization and Why IT Issues: We’ll begin by understanding what localization is and the way IT can profit your app.
- Organising Localization in Flutter: This consists of including the mandatory dependencies and tweaking the MaterialApp widget to help a number of languages.
- Creating Language Information: You’ll learn to create information for various languages your app will help.
- Producing Localization Lessons: We’ll present you how one can generate the mandatory courses for localization utilizing the intl_translation package deal.
- Implementing Localization in Widgets: We’ll present you how one can use these localization courses in your Flutter widgets.
- Dealing with Dynamic Locale Modifications: You’ll learn to change the app’s language dynamically whereas IT’s operating.
- Superior Localization Strategies: We’ll discover some superior suggestions and tips for simpler localization.
- Recap and Extra Sources: We’ll summarize the important thing factors and supply assets for additional studying.
By the tip of this text, you’ll have a strong understanding of how one can localize your Flutter app constructing, making IT extra interesting and user-friendly for a worldwide viewers.
What’s Software Localization?

Localization is the method of tailoring a product or content material for a selected area or market.
For cell apps, this implies translating the cell app’s textual content into varied languages and adjusting cultural parts like date and time codecs, foreign money, and measurement items to suit the preferences of customers in numerous areas. Localization makes positive the cell app feels pure and user-friendly to individuals, regardless of the place they’re or what language they converse.
Localization vs Internationalization
Whereas localization and internationalization are associated, they play completely different roles in making an app accessible to a worldwide viewers:
- Internationalization (i18n): Consider this as organising your app to deal with a number of languages and areas from the beginning. IT means organizing your code in order that the textual content and different regional particulars are simple to alter with out rewriting important code patches of the app.
- IT’s like constructing a home with the wiring prepared for any sort of plug.
- Localization (l10n): This comes after internationalization. IT’s about making these adjustments to adapt your app for particular areas. This consists of translating the textual content and adjusting issues like date codecs, foreign money, and measurements to match native preferences.
- IT’s akin to including the best plugs and retailers to match the native electrical energy requirements.
In easier phrases, internationalization is about getting ready your app to deal with completely different languages and areas, whereas localization is about making these adjustments to make sure the app feels pure and user-friendly in every place.
Benefits of Localization
Localizing your Flutter app has some nice advantages:
- Attain Extra Folks: When your app helps a number of languages and areas, extra individuals can use IT, which might help you develop your consumer base and develop your market.
- Higher Person Expertise: Folks desire utilizing apps in their very own language and that observe their cultural norms. This makes them extra comfy and completely happy along with your app, resulting in larger satisfaction and consumer loyalty.
- Stand Out from Opponents: Having a localized app can set you aside from rivals who could solely provide their app in a couple of languages. This offers you an edge in world markets.
- Increase Income: By reaching extra customers and offering a greater expertise, your app can get extra downloads, higher critiques, and better income, particularly in areas the place individuals have extra shopping for energy.
Understanding and making use of localization might help you construct a extra inclusive and profitable Flutter app that connects with customers worldwide.
Localization Setup
Modify Predominant File
To get your Flutter app prepared for various languages, you’ll must tweak the MaterialApp widget. Right here’s how you are able to do IT in easier phrases:
- Open Your Predominant File: Go to your essential.dart file the place your app begins.
- Replace MaterialApp: Make adjustments to the Materials App widget to help completely different languages:
import ‘package deal:flutter/materials.dart’;
import ‘package deal:flutter_localizations.dart’;
void essential() {
runApp(MyApp());
}
class MyApp extends StatelessWidget {
@override
Widget construct(BuildContext context) {
return MaterialApp(
// Add these traces to help localization
localizationsDelegates: [
GlobalMaterialLocalizations.delegate,
GlobalWidgetsLocalizations.delegate,
GlobalCupertinoLocalizations.delegate,
],
supportedLocales: [
const Locale(‘en’, ”), // English
const Locale(‘es’, ”), // Spanish
// Add more languages here
],
locale: Locale(‘en’), // Default language
residence: MyHomePage(),
);
}
}
On this setup:
- localizationsDelegates: These assist Flutter to deal with language-specific duties like formatting dates and numbers.
- supportedLocales: Listing the languages your app will help. Every Locale entry represents a language (like ‘en’ for English) and optionally a area (like ‘US’ for United States).
- locale: Specifies the default language your app will use.
Updating these settings makes your app prepared to talk completely different languages and join with customers globally.
Add Locales
The supportedLocales in MaterialApp tells your app which languages IT can deal with. Every locale, outlined with a Locale object, features a language code (like ‘en’ for English) and generally a rustic code (like ‘US’ for United States).
This helps your app converse the best language and slot in wherever IT’s used.
supportedLocales: [
const Locale(‘en’, ”), // English
const Locale(‘es’, ”), // Spanish
const Locale(‘fr’, ”), // French
const Locale(‘de’, ”), // German
// Add more locales as needed
],
Offering Delegates
To verify your Flutter app can converse completely different languages and look proper for each consumer, you want localization delegates. These delegates are like knowledgeable translators in your app’s interface:
Embrace these consultants in your MaterialApp settings:
localizationsDelegates: [
GlobalMaterialLocalizations.delegate,
GlobalWidgetsLocalizations.delegate,
GlobalCupertinoLocalizations.delegate,
// You can also add your own delegate here if needed
],
These settings assist your app deal with varied languages and kinds:
- delegate: Makes Materials Design widgets perceive completely different languages.
- delegate: Helps primary widgets adapt to completely different languages.
- delegate: Ensures Cupertino-style widgets (like on iOS) converse the best language too.
With these setup steps, your app will get prepared to alter its language and cultural particulars primarily based on what customers desire. IT’s like laying the groundwork in your app to turn into multilingual and user-friendly worldwide.
Including Language Information
In Flutter, ARB information are like organized dictionaries that maintain all of the completely different languages your app speaks. Every ARB file is in easy JSON format, and IT’s devoted to at least one language type. Inside, you’ll discover pairs of keys and their matching phrases in that language.
They’re designed to be simple to replace and preserve monitor of, which is why a number of cell builders use them to handle how their apps converse completely different languages.
Construction
ARB information are like organized lists that retailer translations in your app. They’re designed to be easy and simple:
Every file accommodates pairs of keys and their corresponding translated phrases. For every key, there’s additional information like descriptions or notes. These particulars assist translators perceive the place and the way every phrase ought to be used within the app.
Right here’s an instance of what you’d see in a typical ARB file:
{
“key”: “worth”,
“@key”: {
“description”: “Description of what this phrase means”,
“sort”: “textual content”
}
}
IT’s arrange this solution to make IT simple to maintain monitor of all of the completely different languages your app helps and the way all the things ought to look and sound in each.
English File
Right here’s how an ARB file may search for English (en), the place IT shops two easy phrases—a title and a welcoming message:
{
“title”: “Welcome”,
“message”: “Hey, World!”,
“@title”: {
“description”: “That is the title displayed when the app opens”,
“sort”: “textual content”
},
“@message”: {
“description”: “A pleasant greeting proven to the consumer”,
“sort”: “textual content”
}
}
On this setup:
- “title” holds the phrase “Welcome” that seems because the app’s title.
- “message” shows “Hey, World!” to greet customers.
- @title offers a fast be aware about what the “title” textual content means within the app.
- @message explains what the “message” textual content says, serving to translators perceive the place and how one can use IT.
These information are made this solution to preserve issues organized and clear, making IT simpler for everybody concerned in translating your app into completely different languages.
Spanish File
Right here’s how the ARB file seems for Spanish (es), which interprets the identical keys utilized in English into Spanish:
{
“title”: “Bienvenido”,
“message”: “¡Hola, Mundo!”,
“@title”: {
“description”: “El título que aparece al abrir la aplicación”,
“sort”: “textual content”
},
“@message”: {
“description”: “Un saludo amigable mostrado al usuario”,
“sort”: “textual content”
}
}
On this instance:
- “title” now says “Bienvenido,” which suggests “Welcome” in Spanish.
- “message” interprets to “¡Hola, Mundo!” for “Hey, World!” in Spanish.
- @title describes what the “title” textual content means for translators.
- @message explains the aim of the “message” textual content.
These information are named by their locale, like app_en.arb for English and app_es.arb for Spanish. By holding these information organized, you possibly can simply add new languages and replace translations at any time when wanted. This ensures your app speaks fluently to customers all over the world.
Localization Class Era
The intl_translation package deal is absolutely helpful for turning ARB information into Dart code that your Flutter app can use to speak in numerous languages. Right here’s the way you set IT up:
First, you add the intl_translation package deal to your pubspec.yaml file beneath dev_dependencies:
dev_dependencies:
intl_translation: ^0.17.10
After including this, run flutter pub get in your terminal to put in the package deal.
This package deal does the heavy lifting of changing your app’s language information into code that helps your app swap languages easily. IT’s like having a language knowledgeable that makes positive your app speaks fluently to everybody who makes use of IT.
Operating Command for Era
As soon as your ARB information are arrange and also you’ve put in the intl_translation package deal, the subsequent steps contain turning these information into usable Dart code in your Flutter app.
Right here’s the way you do IT:
Extract Messages: First, create a template file (intl_messages.arb) that lists all of the phrases and phrases you wish to translate in your Dart code. Use this command to seek out and listing them:
flutter pub pub run intl_translation:extract_to_arb –output-dir=lib/l10n lib/essential.dart
- This command scans your Dart code (ranging from lib/essential.dart) to seek out the phrases that want translating. Then, IT creates a brand new intl_messages.arb file within the lib/l10n folder.
Generate Dart Information: Upon getting your ARB information (like app_en.arb and app_es.arb) prepared with translations, IT’s time to show them into precise Dart information that your app can use. Run this command:
flutter pub pub run intl_translation:generate_from_arb –output-dir=lib/l10n –no-use-deferred-loading lib/l10n/intl_messages.arb lib/l10n/app_*.arb
2. This command takes these ARB information and makes them into Dart information, placing them within the lib/l10n folder.
These steps are like turning a e-book right into a language that everybody can learn. IT helps your app perceive completely different languages so IT can converse to individuals wherever they’re.
Overview of Information
The intl_translation package deal creates a couple of essential information that assist your app deal with completely different languages:
- messages_all.dart: This file gathers and masses all of the translated messages out of your ARB information. IT’s like a library that holds all of the translations your app wants.
- messages_<locale>.dart: For every language (like messages_en.dart for English or messages_es.dart for Spanish), the package deal makes a particular Dart file. These information include all of the translated phrases for that language, ensuring your app speaks fluently in every locale.
- intl_messages.arb: This file is the place IT all begins. Throughout step one, IT’s created to listing all of the phrases and sentences in your app that want translating. Consider IT because the blueprint that guides the interpretation course of.
These information work collectively to ensure your Flutter app can swap languages easily and sound pure wherever IT’s used. Following these steps ensures your app may be understood and liked by customers all all over the world.
Including Localization in Widgets
Utilizing Localized Strings in Widgets
When you’ve generated the localization courses, the subsequent step is to include these translated phrases into your Flutter widgets. Right here’s how you are able to do IT:
- Accessing Localizations: The generated courses present a simple solution to entry these translations, typically via a singleton sample. Usually, you possibly can retrieve localized strings through the use of the Localizations.of technique inside your widgets.
- AppLocalizations Class: Relying in your setup, you may make the most of an AppLocalizations class as an alternative. This class serves as a conduit, facilitating your widgets to find and displaying the suitable translations.
By following these steps, your Flutter app can seamlessly swap between languages, guaranteeing clear communication and a welcoming consumer expertise worldwide.
Instance: Utilizing Localized Strings in a Widget
Right here’s a easy information on how one can combine and show localized phrases in a Flutter widget:
Import Generated Localization Information:
Begin by importing the mandatory localization information firstly of your Dart file. This consists of the generated AppLocalizations class.
import ‘package deal:flutter/materials.dart’;
import ‘package deal:flutter_localizations/flutter_localizations.dart’;
import ‘generated/l10n/app_localizations.dart’; // Alter the trail as wanted
Modify MaterialApp to Use Localizations:
Guarantee your MaterialApp setup consists of the generated localization delegates and lists supported locales.
import ‘package deal:flutter_localizations.dart’;
import ‘package deal:flutter/materials.dart’;
void essential() {
runApp(MyApp());
}
class MyApp extends StatelessWidget {
@override
Widget construct(BuildContext context) {
return MaterialApp(
// Add these traces to help localization
localizationsDelegates: [
GlobalMaterialLocalizations.delegate,
GlobalWidgetsLocalizations.delegate,
GlobalCupertinoLocalizations.delegate,
],
supportedLocales: [
const Locale(‘en’, ”), // English
const Locale(‘es’, ”), // Spanish
// Add more languages here
],
locale: Locale(‘en’), // Default language
residence: MyHomePage(),
);
}
}
Entry Localized Strings in a Widget:
Make the most of the AppLocalizations.of(context) technique inside your widget to entry localized strings.
class MyHomePage extends StatelessWidget {
@override
Widget construct(BuildContext context) {
return Scaffold(
appBar: AppBar(
title: Textual content(AppLocalizations.of(context)!.title), // Show localized title
),
physique: Middle(
baby: Textual content(AppLocalizations.of(context)!.message), // Show localized message
),
);
}
}
On this instance:
- of(context) retrieves the localized occasion of the AppLocalizations class.
- title and message properties correspond to keys outlined in your ARB information for various languages.
Right here’s a simplified view of how your ARB information may search for the above instance:
English (en) ARB File:
{
“title”: “Welcome”,
“message”: “Hey, World!”,
“@title”: {
“description”: “Title for the welcome message”,
“sort”: “textual content”
},
“@message”: {
“description”: “A pleasant greeting”,
“sort”: “textual content”
}
}
Spanish (es) ARB File:
{
“title”: “Bienvenido”,
“message”: “¡Hola, Mundo!”,
“@title”: {
“description”: “Título para el mensaje de bienvenida”,
“sort”: “textual content”
},
“@message”: {
“description”: “Un saludo amistoso”,
“sort”: “textual content”
}
}
Following these steps ensures your Flutter app shows the right localized content material primarily based on the consumer’s language desire, delivering a seamless expertise in your world viewers.
Dealing with Locale Modifications Dynamically
To make sure your app is user-friendly and adaptable, permitting customers to change languages whereas utilizing the app is essential. Flutter supplies an easy solution to obtain this by updating the locale of MaterialApp dynamically. Right here’s a simplified strategy utilizing StatefulWidget for managing state:
Setting Up State Administration
Start by organising the state administration for dealing with locale adjustments:
import ‘package deal:flutter/materials.dart’;
import ‘package deal:flutter_localizations/flutter_localizations.dart’;
import ‘generated/l10n/app_localizations.dart’; // Alter the trail as wanted
void essential() {
runApp(MyApp());
}
class MyApp extends StatefulWidget {
@override
_MyAppState createState() => _MyAppState();
}
class _MyAppState extends State<MyApp> {
Locale _locale = Locale(‘en’); // Default locale is English
// Perform to replace the locale
void _changeLocale(Locale locale) {
setState(() {
_locale = locale;
});
}
@override
Widget construct(BuildContext context) {
return MaterialApp(
localizationsDelegates: [
AppLocalizations.delegate,
GlobalMaterialLocalizations.delegate,
GlobalWidgetsLocalizations.delegate,
GlobalCupertinoLocalizations.delegate,
],
supportedLocales: [
const Locale(‘en’, ”), // English
const Locale(‘es’, ”), // Spanish
// Add other supported locales here
],
locale: _locale, // Dynamically up to date locale
residence: MyHomePage(onLocaleChange: _changeLocale),
);
}
}
Creating the Locale Change Perform
Outline a perform inside your StatefulWidget to deal with the locale change. This perform updates the _locale variable when referred to as:
void _changeLocale(Locale locale) {
setState(() {
_locale = locale; // Replace the locale
});
}
Using Locale in Widgets
In your app’s widgets, make the most of the up to date _locale variable to dynamically show localized content material:
class MyHomePage extends StatelessWidget {
last Perform(Locale) onLocaleChange;
MyHomePage({required this.onLocaleChange});
@override
Widget construct(BuildContext context) {
return Scaffold(
appBar: AppBar(
title: Textual content(AppLocalizations.of(context)!.title), // Show localized title
),
physique: Middle(
baby: Column(
mainAxisAlignment: MainAxisAlignment.middle,
kids: [
Text(
AppLocalizations.of(context)!.message, // Display localized message
style: TextStyle(fontSize: 18),
),
SizedBox(height: 20),
ElevatedButton(
onPressed: () => onLocaleChange(Locale(‘es’)), // Example of changing to Spanish locale
child: Text(‘Switch to Spanish’),
),
],
),
),
);
}
}
Following these steps permits your Flutter app to dynamically alter its language primarily based on consumer preferences. This enhances consumer expertise by guaranteeing that content material is displayed within the consumer’s most popular language, contributing to a extra inclusive and accessible software.
Implementing a Language Choice Dropdown
To empower customers with the flexibility to decide on their most popular language, you possibly can combine a dropdown menu inside your MyHomePage widget. This function permits customers to effortlessly swap between supported languages.
Improve your MyHomePage widget with a dropdown menu that facilitates language choice:
class MyHomePage extends StatelessWidget {
last Perform(Locale) onLocaleChange;
MyHomePage({required this.onLocaleChange});
@override
Widget construct(BuildContext context) {
return Scaffold(
appBar: AppBar(
title: Textual content(AppLocalizations.of(context)!.title),
),
physique: Middle(
baby: Column(
mainAxisAlignment: MainAxisAlignment.middle,
kids: <Widget>[
Text(AppLocalizations.of(context)!.message),
SizedBox(height: 20),
DropdownButton<Locale>(
value: Localizations.localeOf(context),
icon: Icon(Icons.language),
onChanged: (Locale? newLocale) {
if (newLocale != null) {
onLocaleChange(newLocale);
}
},
items: <Locale>[
Locale(‘en’, ”), // English
Locale(‘es’, ”), // Spanish
// Add other supported locales here
].map<DropdownMenuItem<Locale>>((Locale locale) {
return DropdownMenuItem<Locale>(
worth: locale,
baby: Textual content(_getLocaleName(locale)),
);
}).toList(),
),
],
),
),
);
}
String _getLocaleName(Locale locale) {
swap (locale.languageCode) {
case ‘en’:
return ‘English’;
case ‘es’:
return ‘Spanish’;
// Add different supported languages right here
default:
return locale.languageCode;
}
}
}
Rationalization
- DropdownButton: This widget shows a dropdown menu with language choices. IT exhibits the present chosen language and triggers the onChanged perform when a brand new language is chosen.
- onLocaleChange: This perform is handed from the father or mother widget (usually MyApp) and updates the app’s locale when a brand new language is chosen.
- _getLocaleName: This technique converts the language code right into a readable language title for show within the dropdown menu.
Incorporating a language choice dropdown into your Flutter app permits customers to change languages seamlessly. This function enhances consumer expertise by offering flexibility and inclusivity, guaranteeing your app is accessible and interesting to a worldwide viewers.
Abstract of Carry out Localization in Flutter
On this information, we explored the elemental elements of creating your Flutter app accessible throughout completely different languages and areas. Right here’s a recap of what we lined:
Understanding Localization
Localization entails adapting your app to cater to particular languages and cultural preferences of customers worldwide. IT ensures your app feels native and intuitive no matter the place IT is used.
Setting Up Localization in Flutter
To begin, we built-in important dependencies and configured the MaterialApp widget:
- Added dependencies like flutter_localizations for dealing with completely different locales.
- Configured MaterialApp with localization delegates (e.g., GlobalMaterialLocalizations) and supported locales (e.g., English, Spanish).
Creating Language Information
We used ARB (Software Useful resource Bundle) information to handle and arrange localized strings:
- Every ARB file corresponds to a selected locale (e.g., en for English, es for Spanish).
- Examples demonstrated how one can construction and keep ARB information for various languages.
Producing Localization Lessons
We utilized the intl_translation package deal to automate the technology of Dart code from ARB information:
- Extracted messages from Dart code into intl_messages.arb.
- Generated Dart information (e.g., messages_en.dart, messages_es.dart) to entry localized strings programmatically.
Implementing Localization in Widgets
In Flutter widgets, we accessed and displayed localized content material utilizing generated localization courses:
- Used strategies like AppLocalizations.of(context) to retrieve and show localized strings dynamically.
- Demonstrated how one can combine localized titles and messages into widget elements.
Dealing with Locale Modifications
To reinforce consumer expertise, we enabled dynamic locale adjustments inside the app:
- Applied state administration (e.g., StatefulWidget) to replace the app’s locale.
- Built-in a dropdown menu permitting customers to pick out their most popular language at runtime.
Summing IT up
Implementing localization methods permits your Flutter software to successfully help a number of languages and adapt to numerous cultural contexts. This strategy not solely enhances accessibility but additionally broadens your app’s enchantment to a worldwide viewers, fostering a extra partaking consumer expertise general.
On condition that we dwell in a worldwide village, having a Flutter software with a global-first strategy via localization makes a number of sense.
When you want any help with Flutter app localization or every other cell app growth service, get in contact with our staff at [email protected]. Xavor has been within the IT companies trade for practically three many years.
Our staff of Flutter builders has delivered modern cross-platform apps for startups, SMEs, and Fortune 500s.
Are you our subsequent success story? Let’s discover out!
👇Comply with extra 👇
👉 bdphone.com
👉 ultraactivation.com
👉 trainingreferral.com
👉 shaplafood.com
👉 bangladeshi.help
👉 www.forexdhaka.com
👉 uncommunication.com
👉 ultra-sim.com
👉 forexdhaka.com
👉 ultrafxfund.com
👉 ultractivation.com
👉 bdphoneonline.com
👉 Subscribe us on Youtube